489 – Preparing to Put a Plugin on the WordPress Repository
Announcements
Is there a plugin for that?
With more than 50,000 plugins in the WordPress repository, it’s hard to find the perfect one. Each week, I will highlight an interesting plugin from the repository.
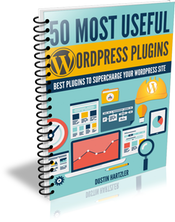
For more great plugins, download my 50 Most Useful Plugins eBook.
WP Dashboard Messages is a plugin to add messages to the WP-Admin Dashboard.
Preparing to Put a Plugin on the WordPress Repository
Thank You!
Thank you to those who use my affiliate links. As you know I make a small commission when someone uses my link and I want to say thank you to the following people. For all my recommended resources, go to my Resources Page
Full Transcript
Business Transcription is provided by GMR Transcription.On today’s episode we are going to continue the discussion about plugins on the WordPress repository and kinda the steps to prepare a plugin and get it ready for launching out there and putting it on the repository for hundreds, or thousands, or even tens of thousands of people using. Right here on Your Website Engineer podcast, episode No. 489.
Hello and welcome to another episode of Your Website Engineer podcast. Again, my name is Dustin Hartzler and today we are going to be talking about plugins and whatnot, and we’ll get a little bit into the story of what it took to update the plugin “As Heard On.” We’ll talk about that in just a minute, but first, I have a couple announcements. The first one is that WordPress 5.4.1 is now available. It is a security and maintenance release. It had 17 bug fixes and seven security fixes, and since it’s a security release, a recommend update the sites immediately. All versions since WordPress 3.7 have also been updated and that is a lot of versions ago, but anyways, it just talks about – there’s a link in the show notes that you can go and read, and all the security things that are fixed, and then there’s a bunch of things that were broken that they fixed as well. So, you can read all about that if you’re interested.
And, then, the other plugin or the other news item that I wanna share with you today is about WordPress – or WordCamp Spain happened just a little bit ago and Matt Mullenweg did a virtual event, or a virtual Q&A, and they talked a little bit about virtual events and WordPress and – of course WordPress – and the future of page builders. And, so, I have a link in the show notes for the article. It’s over on WP Tavern, and then if you scroll down to the bottom, it has the Q&A session. It is all the way at the end. So, the last hour. So, about four and a half hours in and the question and answer is all in English, which is very helpful, but the rest of the WordCamp is all in Spanish. So, if you want to work on your Spanish skills a little bit, you can go ahead and listen in or just kinda keep that going on in the background, but that is WordCamp Spain.
All right. Now, let’s move on into the: “Is there a plugin for that section?” This one today is called “WP Dashboard Messages” and this can be found in the WordPress repository by searching for that, or you can find the link in the show notes for episode no. 489. But, this is a plugin – a very simple plugin – that allows you to add messages to the WP admin dashboard. So, you can select from different styles and layouts. It is multisite supported. You can do network messages or just single site messages and there’s developer-friendly hooks that you can use, but basically what this is is if you want to put up some sort of alert, or notification, or just let whoever is logging into your site see something when they log in and look at the dashboard for the first time, that is what the “WP Dashboard Messages” plugin does.
All right. Let’s go ahead and talk about plugins on the WordPress repository. So, I talked last week a little bit about a plugin that I have and it’s called “As Heard On.” It is a testimonial style plugin that I just wanted to be able to put on my website so I can showcase and I can let other people know: “Hey, if you like the interview with me, maybe you’ll like me being interviewed on other shows.” And, this was back in the day when I did a lot of interviews and I talked about WordPress through a lot of different people. And, so, I created this plugin and it gave me the ability to go in and I could put in the link to the article, and I could put their [inaudible] [00:03:13] work, and I could do all this stuff. And, so, it would automatically generate and it would show the latest five or you could set it up to do whatever.
So, I created this plugin. I got it submitted to the WordPress repository, yada yada yada, and then this week I looked at it and I realized that it was outdated. And, we just talked about WordPress 5.4 was released and it said it was eligible to be working with – or the last known version it was working with was 4.9. And, so, when you look at that on the WordPress page – if you go to the WordPress repository and search for “As Heard On” – if it hasn’t updated in the last three major releases, there’s a notification that says: “This has not been updated recently.” And, that’s usually a red flag when you’re trying to install plugins and whatnot.
So, all I had to do was go in and change the README file. And, again, this was a process among a process. Basically, it doesn’t use GitHub or Git version control but it uses something called SVN and it’s kind of an older technology, but basically that’s a way to take the files that are on your computer and then upload them securely to the WordPress repository server. And, it took me awhile and I first thought I needed a client and then I realized I could do it via the command line, but then the command line didn’t have SVN built-in with the Apple developer tools anymore. So, then, I had to install SVN. It was this big process. Literally, I updated two little things and it was the 4.9 I changed to 5.4. That’s all I changed and it took me more than an hour.
Now, I guess if I was doing this regularly – if I was updating plugins and whatnot – then I would probably get a little better at this. But, since it was 4.9, which was more than three releases ago – which was back in 2017 when I updated this – two and a half years ago since I did this, I’ve kind of forgotten. So, that’s not the point of the podcast but I just wanted to tell you that story and the fact that it takes some maintenance – it takes some time – so, if you’re thinking about taking a plugin that you’ve created, which what we’re gonna talk about today, if you’ve thought about that – you wanna put one on the WordPress repository – know that you are gonna have to probably learn some new skills. That’s where I was going with that story. You’re gonna have to learn some skills on how to use SVN or how to use the terminal or find a client that’s gonna work and learn some new things to get this approved and up onto the WordPress repository.
So, this all comes after you’ve submitted the plugin. You have to learn all this, but before you submit the plugin, I want to talk about the steps of getting ready to put a plugin out there on the WordPress repository. So, the first step is the read the guidelines and that’s the thing that we did last week. We talked all about the guidelines, the things that are allowed, the things that aren’t allowed, the things that – you can’t do this or you can’t do this. We talked about all of those things. It’s GPL compliant, there’s no spamming, there’s no obfuscated code, there’s nothing illegal or morally offensive, yada yada yada. Okay, so, we’ve talked about that.
Then the second thing is you have to have a name for your plugin. So, depending on what you’re doing or the name of the thing – I came up with “As Heard On.” It’s kind of like the “As Seen On TV.” It’s like, “As Heard On Other Podcasts.” And, so, I came up with that name and, luckily, that name was available because what happens is you have to go and first check the plugin’s directory. So, you go to WordPress.org and you enter your desired plugin’s name. And, so, if you search for “As Heard On” – if nothing comes up, then you know that there are no other plugins with that exact name. There’s a chance, I guess, that there could be a plugin submitted with that same name but the user hasn’t submitted their first commit from subversion. So, don’t get super excited but you want to submit your plugin as soon as possible to guarantee that you get the name. If that plugin name already exists, you just have to brainstorm to find a new name or think of a new name.
That’s why a lot of these plugins that I recommend every week or kind of point out have “WP” at the beginning or they have these really long names and sometimes it’s just because there’s no shorter names that are available in the WordPress repository. Get more than 50,000 plugins there so there’s a good chance that somebody else might be having it. Okay, so, we’ve found our name, we’ve figured out what it is, and then the next thing is gonna be is we’re gonna create a plugin that works. That seems kind of obvious. We don’t wanna put a plugin on the WordPress repository that doesn’t work or doesn’t do anything.
So, we’re gonna first work through setting up the plugin to do exactly what you need. There is a plugin framework. It’s called the WordPress Plugin Broilerplate Framework and that’s over at wppb.io. It’s a great way to get it up and running fast with a solid foundation. It’s basically all the code and just kind of generic and then you go in and you add your name, and you add the plugin name, and you put the description, and then you start filling in pieces of it. It just kinda gives you the framework – I guess – the backbone of setting up a plugin that you can put on the WordPress repository. I’ll put a link in the show notes for a couple different articles of how to use the WordPress – or the WordPress Broilerplate Template, just to give you a little bit of an idea of – there’s a three part series that you can read through and just kinda gives you an idea of how this plugin works. So, that will allow you to get started with creating that plugin.
Now, the next thing that we wanna do is we want to create a README file. And, so, the README file is used to populate a WordPress plugin directory page, and if you want to really make it stand out, we need to follow these few tips. And, there’s a link to an article that I found on SitePoint that I’m going to reference as well in the show notes for this episode. But, basically, we wanna create a good plugin page because once a WordPress plugin is installed, the short version – or the short description – can be displayed in the installed plugin’s page of the admin panel based on the correct formatting and whatnot. But, all the rest of the information needs to be in a README file, which will show up on the WordPress.org repository page. When you go and you look for a plugin and then you can read about it and you see the screenshots and you see all that kind of stuff, that’s what the README file is doing. It’s basically creating all this information.
And, there’s two ways to get very useful information into the WordPress repository. The first one is the comments in your plugin’s main file – we’ll talk about that in a second – and the README.TXT file. Both of these files are located in the root directory and they have very important information that will allow you to get the right information into the WordPress repository.
So, your plugin will probably contain multiple files, but you’ll have at least one main file and this one will have it at the very, very top – and this comes with the WordPress BroilerPlate – but it basically is a commented section that will say the name, the plugin URL, the description, the version number, the author, the author URL, and what kind of license it has. It basically has all these fields and you can fill them in or you can not just depending – you don’t necessarily need the plugin URI. It’s basically a URL that describes your plugin. Maybe you have a website that’s dedicated specifically to the plugin. That would be a good place for that. If you’re running BackupBuddy, that’s probably gonna take you to the iThemes website pointing to the BackupBuddy page.
So, you need all this information and this is what shows up in that little description area inside the plugin section. So, that’s kinda the right-hand side when you’re looking at it. It gives you the version number, it gives you the name of the developer and their link to their website, and the details into the plugin and whatnot. So, that all shows up absolutely right there. That’s what the top file is there in your main folder or whatever your main plugin file is and it’s usually “something.php.” I always name mine the name of the plugin. So, mine is: as-heard-on.php.
And, then, the README file is – again – that README.TXT file must be in the root directory of your folder and it gives you all kinds of information there. So, first, there is a special section at the beginning for the header and this allows you to add tags if you want, and you can do a donate link if you wanna have people be able to donate to you. There’s an area where you can say “requires at least.” And, so, you can say the minimum version of WordPress. You can say “test it up to” and this was what I changed today from 4.9 to 5.4. That’s what I updated there. You can see the stable tab. So, that’s the stable version that’s running. So, if it’s version 1.0, or 2.0, or whatever, you can do that. You can have links to the license and then a short description of your plugin. So, all of that information shows up right there in the WordPress repository right there at the very, very top.
So, we can also fill out information about contributors. So, that gives you the ability to have multiple people. So, if there’s one person, two person, three person – if they’ve all contributed to it, you can add that and then that will link to their profiles on WordPress.org and you can put all of that information in there. Also, you want to put in installation information if you wanna activate the plugin, or put this here, or do this, or you can give installation instruction. All of this text is written in Markdown and Markdown is just kind of a plain Jane way to format these README files. And, so, it will say “installation” and then it’ll put everything that’s in the installation tab and then there’ll be FAQs, or screenshots, or changelogs.
And, basically, what you do is you put two equal signs, installation, and then two equal signs, and then put the steps “One, two, three: Here’s the things you need to do to set that up.” If you wanna do a frequently asked questions section, you have to do equal, equal, and then “frequently asked questions,” equal, equal. And, so, the text – again – there’s a link in the show notes to the SitePoint article, but it is very specific and you have to follow the standards exactly. And, then, once you’ve done that, then it’ll automatically format properly on the WordPress repository page. So, that’s frequently asked questions, then there’s changelogs and uploads – or upgrade notices – and, so, you put the changelogs. So, you put 1.0 and “this is a beautiful button,” and 1.0.1 – “oops I fixed the button,” and 2.0 and “here’s this brand new feature and a new button,” and whatnot. And, so, those will all show up if they’re in the README.TXT file. They’ll show up in the changelog section in the WordPress repository.
Let’s see what else…there’s all kinds of sections that you can add. The more information that you put inside of the WordPress page, the better. It’s gonna give people more information. Screenshots are really, really helpful. You can add all of these files. Basically, you can only use a couple different formats. You can use PNGs, JPEGs, or GIFs for your screenshots in there and then you can put those all inside of a – there’s a folder called “assets.” And, so, you can put all of them in there and then you can also do a banner. So, those are the banner images that go across the top and those are also a very good pieces of information. It’s worth a little bit of time of figuring out: “Okay, what kind of banner image do I want?” And, then, take that time to create that.
So, that is the README file once you’ve created it, and then there is a Readme Validator. So, once we’ve written it, there’s a Readme Validator that you can paste your README text into there and then it’ll let you know whether or not that you have it formatted properly. And, then, you’ll submit your plugin for review and we talked about this last week – about how to submit it for a review. I guess to submit it, first you have to have a WordPress account. So, you’ll create a WordPress.org account and put in your username, email, website, location, occupation, and interests. You put all the information in and then you will add your plugin. You’ll basically give your name of the plugin, a plugin description – so, the one that you added into the README – and then you will put a URL to a zip file. So, you’ll upload it somewhere, and then you’ll give it to the zip file, and then that’s what you need to do.
You’ll wait for approval, and then once you’ve got approved, you’ll get an email and it’ll say your plugin hosting request has been approved. Within an hour you’ll have the access to the SVN repository and then it gives you the link to the repository. And, then, the next tricky part is to get it onto the WordPress repository. Getting it onto the repository is a step in itself. You just spent all of this time trying to get your plugin perfect for the WordPress repository and now it’s to get it into the subversion repository with the other command line. That seems to be the easiest way that I could figure out how to do it, and basically you have to SVN into the plugin link that they give you, and then they’ll ask for your username and your password. And, then, once you’re in there, then you’ll be able to commit and send details.
And, I’m not gonna talk about this in this podcast episode because it will take way more time and it’s way too confusing to figure out how to do that and talk about on a podcast. I will link to an article that explains some of that and how to upload and how to get that into the WordPress repository, but you’ve done the really, really hard part of creating the plugin, getting it approved, and then the last, most difficult part – like I said – is to get it uploaded to the right place on the WordPress repository.
And, we’ll cut this episode for here ‘cause I’m not gonna talk about that because it confuses me, still to this day, 10 years later. And, I guess I’ve had a plugin on the repository probably – I guess I should’ve looked at my changelog – probably since, I don’t know, 2012? 2013? And, it still confuses me every time I have to do it and that’s why I always put off my updates, which I shouldn’t do, but that’s what happens sometimes in real life. It’s like, “Oh, I should update this. Oh, I should update this. Oh, it’s gonna take me more than an hour.” I’ll be more diligent about it next time, now that I can remember how to do it. But, that’s what I wanted to share with you today.
Again, it’s a little bit of a process to set up and to configure and create a plugin. Now, you can do all of this work if you want. If it’s a plugin that you’re just gonna use for a bunch of client sites, you can create that really great README file. That’s really not gonna be necessary other than people logging into – if that’s where you wanna point them – to the documentation. Maybe you create a page inside the page settings to highlight how to use the plugin or whatnot, but if that’s the case, then you just create a really great section – note section – at the very top – the commented section at the very top of your plugin, which tells the name of the plugin and what version it is and that kinda stuff. That’s all you’d have to do for a plugin that you’re not gonna host on the WordPress repository.
So, that’s what I wanted to talk about. That’s what I wanted to share with you this week, and if you are interested in doing that, let me know. Let me know what kinda plugin that you’re updating and if you need to have someone take a look at it. I’d be more than willing to do that. So, you can send me an email at dustin@yourwebsiteengineer.com, and until next week, take care and we’ll talk again soon. Buh-bye!