424 – Convert Existing Posts to Gutenberg Blocks
Announcements
Is there a plugin for that?
With more than 50,000 plugins in the WordPress repository, it’s hard to find the perfect one. Each week, I will highlight an interesting plugin form the repository.
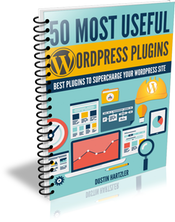
For more great plugins, download my 50 Most Useful Plugins eBook.
WP Last Modified Info is a plugin to add last modified / updated info on your WordPress posts and pages.
Convert Existing Posts to Gutenberg Blocks
In today’s episode we dive into how to convert our previously published posts and pages and turn them into the new block format.
On a current post:
- go to the Class Post menu and select the three vertical dots on the right
- next select the Convert to Blocks option
- review the block conversion to make sure the conversion was done correctly
- optional: turn any blocks that are in multiple posts into reusable blocks
- save the post
Thank You!
Thank you to those who use my affiliate links. As you know I make a small commission when someone uses my link and I want to say thank you to the following people. For all my recommended resources, go to my Resources Page
Full Transcript
Business Transcription is provided by GMR Transcription.On this week's episode, we are going to talk about how to convert our existing post and pages into the new format, the new block editor format, or Gutenberg if you will, on out WordPress site. Right here on Your Website Engineer podcast episode #424.
Hello, and welcome to another episode of Your Website Engineer podcast. My name's Dustin Hartzler. I'm excited to be here with you today, because we're going to be talking about something that we can do to kind of convert or get our "old websites," I'm saying that in quotes, "old website" into the newer format in the newer version of the block editor with WordPress. We'll get to that in just a couple minutes. I do have an announcement – two announcements and a plug-in to share with you.
The first announcement is, going along with the block editor feature, but WooCommerce blocks is now a feature plug-in. Version 1.3 introduces six new blocks and so this is a new plug-in that you have to install on – in addition to WooCommerce, but it gives you the ability to really add products throughout your post and your pages, which makes it supper handy and supper convenient to add products to a post or to a page.
Think for example, you talk about a blog post, maybe you write a blog post about the latest and greatest Vitamin C because of the weather here in North America is getting very cold and you want to kind of stave off and get rid of – and not get a cold. Maybe you want to talk about Vitamin C in your favorite products and you have those products in your store on your WooCommerce site, but maybe you will write your entire post and then you want to add a block that has your products in it and you could do that – just exactly that with the product blocks 1.3 version. It's really cool, it gives you the ability to add best-selling blocks, or top-rated, or news – the newest products, or on-sale products. But, you can also have specific products based on what post or page that you're adding it to.
So, if you're using WooCommerce and you want to make it easy to add those posts. Instead of the old way was to add a short code, but then you had to find out what the product I.D. was and then you had to create the short code and it was just kind of a pain. Now the WooCommerce blocks will allow you to do that with just start typing you create the block and then you can start adding. Okay, I want to add Vitamin C, you start typing the product Vitamin C, it's going to find it and automatically create that block for you. So, it's really cool and if you are using WooCommerce I recommend checking that out and to get that new experience and an easy way to add new products to a post or a page.
The other piece of news I want to share with you is about WordPress 5.1, the beta 2 is now out. This came out just today, actually as I'm recording this and the software's still in development but they are trying to release by next week, February 21st, we're trying to get WordPress 5.1 out. It's crazy that WordPress 5.0 took almost a year to get and then about two months later we're getting 5.1. But, that's the continuous cycle, they're continuing to refine and continue to make WordPress work better with the block editor there's more than 100 tickets have been closed since beta 1.
So, beta 1 came out last week and there's just a bunch of cool things that they're working on and continue to make that WordPress experience so much better than it was before, before the block editor came out. And then, in the “Is there a plug-in for that?” section. I found one this week called WP Last Modified Info and this is a plug-in that if you ever update a post this is going to be a perfect plug-in for you. So, most WordPress themes will just usually show the date the post was last published and so if you publish a post three years ago and then you go in and you update it, it doesn't have that information, it doesn't give the ability to say this post was updated on such-a-such a date. Now that's what this pug-in does.
WP Last Modified Info does exactly that, it gives you the ability to add modified or updated info on your WordPress post or page. It's easy to install and activate and there's a configuration very easy, it's just – It just works and it's a plug-in. It has more than 2000 active installs, so it's one that people are using. And so, if you need that type of information on your website if you update posts regularly, I recommend checking out the plug-in. You can find it in the show notes for episode # 424 or you can go and search for WP Last Modified Info on the WordPress repository.
Okay, today we are going to talk about how to convert our old posts or pages into the new WordPress block editor. You might have noticed if you go to an old post that you published a few weeks ago or any time before updating to WordPress 5.0 it's going to have the box and the block is going to be called the classic box, or the classic editor box. And basically what that is, is just one long box that’s got all the information and just kind of like the old editor was it was just one long post. And if you want to be kind of updated, or you want to have all your styles match perfectly across your website, you might want to go through and convert each of these to individual blocks. Now it can be very tedious, especially like on yourwebsiteengineer.com. More than 400 podcast episodes and I’d have to go in and manually do it one at a time. I haven’t found a way to do it automated yet. But, doing it one at a time could get very, very tedious. It could be one of those things that you’re like, well maybe over the course of the year I’ll get my entire site moved over to this new version and maybe you do 10 per week or whatever, you know like as you work through in kind of a methodical process.
Let’s first talk about what WordPress blocks are. We talked about WordPress blocks all this month and what they are. But I want to talk about some of these ones that are default standard inside of WordPress and they come with WordPress 5.0. I don’t know if I mentioned this on any other shows but I will run through them real quick.
You can do a paragraph block, which is just basic paragraph text. You’ve got a list, so that adds a bulleted or numbered list. You can add an image, that’s pretty self-explanatory. You can add a heading, that’s explanatory as well. You can do a quote, so if you wanted to do a block quote to add emphasis to a – some sort of statement on your page, you can use a quote. You can add a cover, which is an image or a video with text overlay, which is great for headers. You can do a gallery, so you can do multiple images in a rich gallery. You can do audio, so embed an audio player. You can do a downloadable file, which is nice so that was never really a feature before.
You can do videos, you can embed videos from your media library, you can upload a new one. You can use classic, that’s the classic WordPress editor. That’s what we’re going to see if we don’t do anything to our old posts or pages. We can do a poll quote, so this gives special visit visual emphasizes to quote from your text. You can do a table, that’s pretty spiffy when it comes to the new version, you could never do that before. So, tables those are really cool. You can use a verse. So, this is like poetry, it’s got special spacing formats or quote song lyrics, you can do that in a verse. You can do code snippets. And so that respects your spacing and your tabs.
You can do custom html if you need something like that. You can do pre-format which adds spacing on the left and the right and shows styling. You can do columns. You can do buttons. You can do media and text, so this is media or word side by side for richer layouts. There’s an option for more, so you can show an excerpt on the home page and then you can click to read more. You can do a page break. So, you can create your content into several page – like a multi-page experience. There’s a separator, which can create a break between ideas or sections with a horizontal line. There’s a spacer so you can add white space in-between your blocks.
You can do a short code. So, you can enter additional short codes that may be part of other WordPress plug-ins. You can do archive, so you can display a monthly archive of your posts. You can display a list of all your categories. You can do a list of your latest comments. You can do your latest posts and you can do embeds. So, you can embed videos, or images, or tweets, or audio, or anything like that.
So, those are all the things that come with WordPress and when you convert from a WordPress classic editor, it’s going to try to put these things in the correct bucket. So, if you’ve got a classic editor and you’ve got a bunch of bullet points it’s going to create a block for bullet points. If it’s got – if most of your content is just a paragraph it’s going to turn them into individual paragraph blocks, which is really nice.
So, how do we actually do this? It’s actually really simple. You just go from the classic block menu. There are three dots on the right-hand side that say more options. You hover over that and it says more options and you click on that to open up the additional window and inside of there you see high block settings, convert block, duplicate, insert before, insert after, edit as html, and remove block. So, the second option there convert to block, you just select that and WordPress will scan the html tags in your content and it’s with really good accuracy goes through and makes each their individual block. Once WordPress is done with the block conversion – and it literally takes seconds, like I mean not even seconds, it’s like click the button and it’s done, especially on the shorter posts that I have on my site.
But, once that’s done then you can start checking it. You want to double-check and make sure things have converted right. And to save you time, you can go to the top and there is a – there’s like three lines, horizontal lines next the info button. So, there’s a plus button, which will add a new block. There’s a forward and backwards for redo – or undo and redo. And then there is the info button and then the next one is the block navigation box. And if you click on that, it’s going to show you a broke down – it’s going to break down what each section is. So, it’s going to say paragraph, paragraph, paragraph heading or heading image, paragraph code, you know, whatever that is list paragraph image, heading, and it’s going to give you a high overview of what each of those blocks are.
And so you can go in, you can see that each individual paragraph. So, every time there’s an enter after some text, that’s considered its own paragraph block. And then it will show you the different headings and whatnot so you can scan through it. I took some time and went through and did a couple posts on yourwebsiteengineer.com and I want to say with 100 percent accuracy, like it did an amazing job. It did things so well that I’m really, really impressed. I’ll probably add a to-do list item every week to do 10 conversions and convert them over just so they’re all consistent.
The real interesting piece is when I converted this to blocks it worked perfectly and seamlessly, even though my posts were originally written in Markdown. So, if I would have opened them back up in mark down or opened them up in the classic editor it would have showed it in mark down. So, instead of using wrapping all of my tags in html or all my links and whatnot in html it would have showed the mark down format. But, when I opened it up in the classic editor, inside the classic block, what that did is it had already rendered everything into html.
And so, my announcements and “Is there a plug-in for that?” section of the show notes were automatically converted to h2 tags because they were already in html. Which I found was kind of interesting. I thought that I was going to have to convert them and then change them from mark down until – it worked really, really well. So, how it works is it just goes through and it scans an html rendered version of your show notes, or blog posts, or page and then it will go through and it says it sees h2 okay that’s going to be a heading so it’s going to change it into the heading block. And it goes through and it does that. I also had a great deal of accuracy if there were a few things that I didn’t like or I wanted to undo. I could hit that undo button and it would take it back to the classic editor and get rid of all those tags that turned them into blocks. So, I thought that was really cool and really, really convenient.
Now, why would you want to go through and go through 400 old episodes and do this? It goes along the lines of some of the thing that we talked about two weeks ago. Of creating those reusable blocks and so right now, I don’t have a way to update the “Is there a plug-in for that?” section. If I make the last four episodes they’re all in block editor mode, then I want to make a change. It’s only going to change on those four episodes. But, maybe I want to update them site-wide. That’s going to be a lot easier to do if they’re all in the block editor or they’re all in their own blocks. Now I haven’t given it a try.
If you convert to a block editor I think you have to go ahead and create those. You’ll create it to a block editor and then you’ll group the things that you need as a reusable block or maybe you’ll modify the posts to add that reusable block. And well I can try that right now, let’s go ahead and if I add a new reusable block I can see if there is a “Is there a plug-in for that?” e-book sign-up. And so, it will go ahead and add that as well, so I would have to go in and remove the “Is there a plug-in for that?” section, the stuff that is already converted and then add the new block.
So, it would be let’s see one, two, three, four, five, six clicks to do that. And so, for each post you would click the button two times to convert to a block editor format and then you would delete the – I have three paragraphs here so I would delete the three paragraphs and then I would from the three paragraphs then I would have to redo and add that new block editor block back in. The reusable block that we talked about a couple weeks ago. So, a little bit tedious but you’re already clicking a few times. I can see that it would maybe 30 seconds to do an update. So, if I did 10 in a week that’s five or six minutes of time if I open them all up and edit them out.
So, that’s what I really wanted to share today is just the ability that the developers thought through and had the foresight in them and ingenuity that eventually maybe we want all of our posts to be very similar in format and for those to all work really well together. And so, I like this and I probably will start working through the old back catalog and working through converting them to block editor posts. Just so I can use those features of oh now all of the “Is there a plug-in for that?” section the text is exactly the same. When it moves from 50,000 plug-ins to 60,000 plug-ins I can go ahead and update them. Or if I want to offer a new e-book or I want to change something, I can change it once and it’s going to change throughout the entire site; which I really, really like.
Plus, if you have reusable blocks, like I explained earlier in – two weeks ago if you have reusable blocks those will actually come out in the e-mail. If somebody has signed-up through Jetpack or WordPress.com signed up for your site to get subscribed when new posts are published, then when things are a reusable block those will publish out in the e-mail. Whereas the short codes will not and those will simply be short codes.
And so, that’s what I wanted to share with you today. It’s a tedious process, it’s probably unnecessary for 95 percent of people, but if you want that really consistent approach, you want all of your texts or all of your bog posts to be exactly the same across hundreds and hundreds posts, then this might be a way to do it. I’m going to do a little research and see if there is a way to do it – can you run some sort of script to go through and do it on the backend? I don’t think so, I think it has to be all done via the interface right there on the web. As far as I can tell, it can only be done inside the WordPress editor on a page-by-page basis.
So, very, very tedious, kind of a pain to do. But, maybe it’ll be worth it in the end if your pages are very, very similar in length or similar in approach. Like mine are, the same announcements, “Is there a plug-in for that?”, the main section of the show, and then a thank you part of the page. If you have something very consistent like that then you may want to go ahead and bite the bullet, spend a little bit of time going through and actually doing the conversion process. And then you’ll be able to use those reusable blocks everywhere on your site and it’ll make managing and keeping things updated that much easier.
Not too detailed of a – complicated of an episode today. You just go from the classic block, click the more options, then convert to blocks, and then do a double check and make sure everything is converted fine. And maybe 30 seconds per post that you can get this done in. But that’s what I wanted to share with you today. If you have that desire and keep me accountable. Let me know in a couple weeks how many of these posts I’ve actually converted to the block editor. I’ll see if I can make a dent in some of them and get them all kind of very, very consistent across the board. So, that’s what I want to share with you this week.
Take care and we got one more week of Gutenberg stuff next week and then we’ll dive into a new topic in February. Right here on Your Website Engineer podcast. We’ll talk to you then. Take care. Bye-bye.
Announcer: For more great WordPress information head on over to yourwebsiteengineer.com.
Dustin Hartzler: Side note here, I have an office space that has limited electricity. Which is really, really crazy and just recording the show was a little bit of a gymnastics feat I guess. I had to reroute all of my recording equipment to one power strip and then plug in an extension cord from the hallway. So, the hallway has full power and all of my outlets in my office only have half power. It wasn’t even enough to charge my laptop or my iMac couldn’t turn on and none of my recording gear would work. So, it’s kind of crazy that it actually worked and everything is working as of right now. And so, I’m going to leave it at that and hopefully tomorrow they’ll have everything fixed. And I will be back to business as usual.
But, kind of an unusual twist to the day, when only my router would work and nothing else would work. It was just really inconsistent. So, I moved the router to a different place and moved some wires and did somethings and now I’ve got one power strip that works. And that’s what I wanted to say. Just a little behind-the-scenes of yourwebsiteengineer.com. So, it’s not always business as usual. Just turn things on and it works. Sometimes, you’ve got to do the behind the scenes things just to get power. Who would have thought in 2019? Alright, that’s all I got. Take care. We’ll talk next week. Bye-bye.